- New
![PTFE Tube Connector for X1/ P1/ AMS [FAC063]](https://dev.marvle3d.co.nz/16696-large_default/bambu-lab-part-filament-buffer-for-p2s.jpg "PTFE Tube Connector for X1/ P1/ AMS [FAC063]")
![PTFE Tube Connector for X1/ P1/ AMS [FAC063]](https://dev.marvle3d.co.nz/16696-medium_default/bambu-lab-part-filament-buffer-for-p2s.jpg "PTFE Tube Connector for X1/ P1/ AMS [FAC063]")
![PTFE Tube Connector for X1/ P1/ AMS [FAC063]](https://dev.marvle3d.co.nz/16697-medium_default/bambu-lab-part-filament-buffer-for-p2s.jpg "PTFE Tube Connector for X1/ P1/ AMS [FAC063]")
![PTFE Tube Connector for X1/ P1/ AMS [FAC063]](https://dev.marvle3d.co.nz/16699-medium_default/bambu-lab-part-filament-buffer-for-p2s.jpg "PTFE Tube Connector for X1/ P1/ AMS [FAC063]")

228 Bush Road, Rosedale | Mon–Sat 9:30–4:30

Auckland Local Stock
Authorized NZ Distributor – Marvle3D
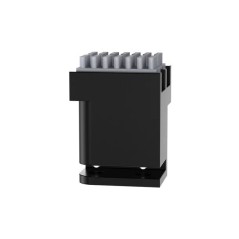
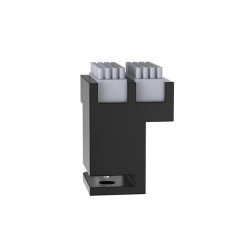
*Bambu Lab Part- PTFE Tube Connector for X1/ P1/ AMS
-Secures PTFE tube for smooth filament feeding
-Maintains proper tension and alignment
-Ensures consistent print quality and reliability
-Durable official replacement component
-Compatible with multiple bambu systems
Compatible With: P1P P1S X1 X1C X1E AMS
Why Marvle3D?
Marvle3D—New Zealand’s expert since 2016, offering friendly support, in-store demos, and one of the country’s largest ranges.
 Security policy(edit with the Customer Reassurance module)
 Delivery policy(edit with the Customer Reassurance module)
 Return policy(edit with the Customer Reassurance module)
Step 1: Hall Switch Pneumatic Connector Replacement
Remove the Hall switch from the extruder using the appropriate guide for your model, then push the pneumatic connector out from the side of the latch—using a small pry tool if needed.
Step 2: X/P Series Buffer Pneumatic Connector (Right Side) Replacement
Remove the buffer from the back of the printer, then unscrew the two screws indicated in the diagram to access the pneumatic connector.
Specific References
No customer reviews for the moment.
Auckland Local Stock
Authorized NZ Distributor – Marvle3D
*Bambu Lab Part- PTFE Tube Connector for X1/ P1/ AMS
-Secures PTFE tube for smooth filament feeding
-Maintains proper tension and alignment
-Ensures consistent print quality and reliability
-Durable official replacement component
-Compatible with multiple bambu systems
Compatible With: P1P P1S X1 X1C X1E AMS
Why Marvle3D?
Marvle3D—New Zealand’s expert since 2016, offering friendly support, in-store demos, and one of the country’s largest ranges.
![3520 AMS Internal Hub Motor for AMS 2 PRO [FAM013]](https://dev.marvle3d.co.nz/16181-home_default/bambu-lab-part-.jpg)
![3520 AMS Internal Hub Motor for AMS 2 PRO [FAM013]](https://dev.marvle3d.co.nz/16179-home_default/bambu-lab-part-.jpg)
![3pc of Ceramic Heater and Hotend Thermistor for P1 [FAH001-CT]](https://dev.marvle3d.co.nz/15833-home_default/bambu-lab-part-ceramic-heater-and-hotend-thermistor-for-p1-3pc.jpg)
![3pc of Ceramic Heater and Hotend Thermistor for P1 [FAH001-CT]](https://dev.marvle3d.co.nz/15834-home_default/bambu-lab-part-ceramic-heater-and-hotend-thermistor-for-p1-3pc.jpg)
![AC Board for X1/ P1 [DLB017]](https://dev.marvle3d.co.nz/16259-home_default/bambu-lab-part-.jpg)
![AC Board for X1/ P1 [DLB017]](https://dev.marvle3d.co.nz/16261-home_default/bambu-lab-part-.jpg)
![Active Chamber Exhaust for H2D [FAC120]](https://dev.marvle3d.co.nz/16208-home_default/bambu-lab-part-.jpg)
![Active Chamber Exhaust for H2D [FAC120]](https://dev.marvle3d.co.nz/16209-home_default/bambu-lab-part-.jpg)
![Active Support Shaft Assembly for AMS 2 Pro [SAA034]](https://dev.marvle3d.co.nz/16473-home_default/bambu-lab-part-.jpg)
![Active Support Shaft Assembly for AMS 2 Pro [SAA034]](https://dev.marvle3d.co.nz/16471-home_default/bambu-lab-part-.jpg)
![AMS 2 Pro Hub for A1 [SA013]](https://dev.marvle3d.co.nz/16332-home_default/bambu-lab-part-a1-mini-ams-hub-for-ams-2-pro.jpg)
![AMS 2 Pro Hub for A1 [SA013]](https://dev.marvle3d.co.nz/16333-home_default/bambu-lab-part-a1-mini-ams-hub-for-ams-2-pro.jpg)
![AMS Active Support Shaft Assembly [SA001-S2]](https://dev.marvle3d.co.nz/15836-home_default/bambu-lab-part-ams-active-support-shaft-assembly.jpg)
![AMS Active Support Shaft Assembly [SA001-S2]](https://dev.marvle3d.co.nz/15837-home_default/bambu-lab-part-ams-active-support-shaft-assembly.jpg)
![Hotend Silicone Sock for H2 [FAH022]](https://dev.marvle3d.co.nz/14194-home_default/bambu-lab-h2d-series-hotend-silicone-sock.jpg)


![Nozzle Wiper Set (3-Pack) - P1 [FAW001]](https://dev.marvle3d.co.nz/14818-home_default/bambu-lab-nozzle-wiper-set-3-pack-p1.jpg)
![Nozzle Wiper Set (3-Pack) - P1 [FAW001]](https://dev.marvle3d.co.nz/14819-home_default/bambu-lab-nozzle-wiper-set-3-pack-p1.jpg)


![PTFE Tube Coupler connector - X1/P1 [FAZ006]](https://dev.marvle3d.co.nz/14820-home_default/bambu-lab-ptfe-tube-coupler-x1-p1.jpg)
![Z Belt for X1/ P1 [FAB002]](https://dev.marvle3d.co.nz/11533-home_default/bambu-usb-c-cable-x1-series.jpg)