- New
![Live View Camera for A1 Mini [CAM003]](https://dev.marvle3d.co.nz/17359-large_default/live-view-camera-for-a1-mini-cam003-.jpg "Live View Camera for A1 Mini [CAM003]")
![Live View Camera for A1 Mini [CAM003]](https://dev.marvle3d.co.nz/17359-medium_default/live-view-camera-for-a1-mini-cam003-.jpg "Live View Camera for A1 Mini [CAM003]")
![Live View Camera for A1 Mini [CAM003]](https://dev.marvle3d.co.nz/17360-medium_default/live-view-camera-for-a1-mini-cam003-.jpg "Live View Camera for A1 Mini [CAM003]")
![Live View Camera for A1 Mini [CAM003]](https://dev.marvle3d.co.nz/17361-medium_default/live-view-camera-for-a1-mini-cam003-.jpg "Live View Camera for A1 Mini [CAM003]")
![Live View Camera for A1 Mini [CAM003]](https://dev.marvle3d.co.nz/17362-medium_default/live-view-camera-for-a1-mini-cam003-.jpg "Live View Camera for A1 Mini [CAM003]")

228 Bush Road, Rosedale | Mon–Sat 9:30–4:30

Auckland Local Stock
Authorized NZ Distributor – Marvle3D
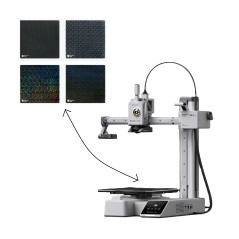
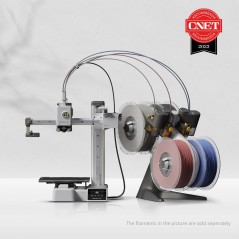
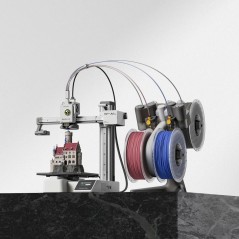
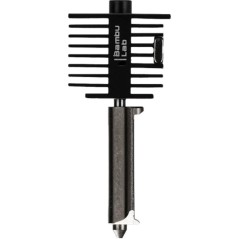
*Live View Camera for A1 Mini [CAM003]
-Enables remote livestream monitoring
-Supports automatic time-lapse recording
-Low-FPS camera included by default
-Used as a direct replacement part
-Does not change camera quality or FPS
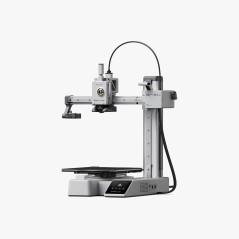
Compatible Printers: Bambu Lab A1 Mini
Why Marvle3D?
Marvle3D—New Zealand’s expert since 2016, offering friendly support, in-store demos, and one of the country’s largest ranges.
 Security policy(edit with the Customer Reassurance module)
 Delivery policy(edit with the Customer Reassurance module)
 Return policy(edit with the Customer Reassurance module)
Live View Camera Replacement Guide - A1 mini
This guide shows the process of replacing the Live View Camera of the A1 mini
In this guide, we will show how to replace the Live View Camera on the A1 mini
Steps to replace the Live View Camera
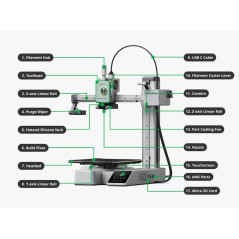
1. Remove the A1 mini motor cover
To access the Live View camera cable, you need to remove the front motor cover. Simply pull from the bottom of the cover towards you and the clips will release.
2. Disconnect the camera cable
Carefully disconnect the camera cable by gently pulling on the white connector. Please avoid pulling on the wire as this can damage the cable/connector.
3. Remove the Live View Camera
To remove the Live View Camera from the A1 mini, you first need to push on the bottom side of the camera, as indicated in the image on the left.
Pressing on the back side of the camera will allow you to gently rotate it as shown in the second image. At that moment, you will be able to pull the camera outside the plastic housing. 
4. Install the new Live View Camera
To install the new Live View Camera, simply follow the previous steps in reverse. First, push the camera into the plastic housing.
Next, align the plastic orientation pins with the slot then push the camera forwards until it sits as shown in the second image below.
5. Re-connect the camera cable
Re-connect the Live View Camera cable and ensure the connector is firmly installed.
6. Re-attach the A1 mini motor cover
To re-attach the A1 Mini motor cover, you can simply push it back in place until you hear the clips “clicking” in place.
How to replace the camera including the cable (optional)
If the problem was not resolved by simply replacing the Live View Camera, you might need to also replace the cable.
To do so, follow steps 1 and 2 from this guide to disconnect the cable.
Then, carefully read the USB C Replacement Guide and follow the same procedure to remove the camera cable from the wire loom.
Specific References
No customer reviews for the moment.
![Live View Camera for A1 Mini [CAM003]](https://dev.marvle3d.co.nz/17360-large_default/live-view-camera-for-a1-mini-cam003-.jpg "Live View Camera for A1 Mini [CAM003]")
Auckland Local Stock
Authorized NZ Distributor – Marvle3D
*Live View Camera for A1 Mini [CAM003]
-Enables remote livestream monitoring
-Supports automatic time-lapse recording
-Low-FPS camera included by default
-Used as a direct replacement part
-Does not change camera quality or FPS
Compatible Printers: Bambu Lab A1 Mini
Why Marvle3D?
Marvle3D—New Zealand’s expert since 2016, offering friendly support, in-store demos, and one of the country’s largest ranges.