- New
![Extruder Gear Assembly for P2S [FAE035]](https://dev.marvle3d.co.nz/16745-large_default/bambu-lab-part-filament-buffer-for-p2s.jpg "Extruder Gear Assembly for P2S [FAE035]")
![Extruder Gear Assembly for P2S [FAE035]](https://dev.marvle3d.co.nz/16745-medium_default/bambu-lab-part-filament-buffer-for-p2s.jpg "Extruder Gear Assembly for P2S [FAE035]")
![Extruder Gear Assembly for P2S [FAE035]](https://dev.marvle3d.co.nz/16744-medium_default/bambu-lab-part-filament-buffer-for-p2s.jpg "Extruder Gear Assembly for P2S [FAE035]")

228 Bush Road, Rosedale | Mon–Sat 9:30–4:30

Auckland Local Stock
Authorized NZ Distributor – Marvle3D
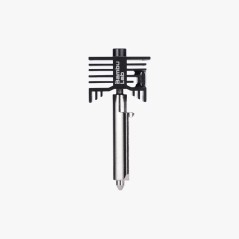
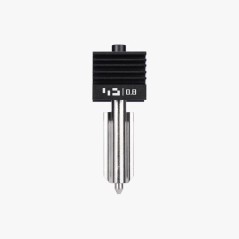
*Bambu Lab Part- Extruder Gear Assembly for P2S
-Designed to replace worn or damaged extruder gears
-Restores stable filament feeding and print consistency
-Prevents issues caused by gear or bearing wear
-Recommended when advised by Bambu Lab support
-Built for reliable long-term extrusion performance
Compatible Printers: P2 Series
Why Marvle3D?
Marvle3D—New Zealand’s expert since 2016, offering friendly support, in-store demos, and one of the country’s largest ranges.
 Security policy(edit with the Customer Reassurance module)
 Delivery policy(edit with the Customer Reassurance module)
 Return policy(edit with the Customer Reassurance module)
Step 1: Remove the Toolhead Housing
Begin disassembly by removing the toolhead housing. Refer to the Replace the Toolhead Housing guide for detailed removal instructions before proceeding with extruder disassembly.
Step 2: Release the Cutter
Hold the cutter handle securely, then use an H2.0 Allen key to loosen the cutter handle screw. Once loosened, allow the cutter to fully disengage from the extruder.
Step 3: Remove the Extruder
Press the pneumatic connector to release tension, then pull the PTFE tube out to detach it from the extruder.
Step 4: Remove the Extruder Filament Sensor
Use an H1.5 Allen key to remove the two mounting screws, then detach and remove the extruder filament sensor.
Step 5: Separate the Extruder Front Cover and Gear Assembly
Place the extruder on a clean surface with the gears facing upward to prevent small parts from falling out. Use an H2.0 Allen key to loosen the single screw, then remove the yellow extruder drive wheel from the extruder.
Specific References
No customer reviews for the moment.
Auckland Local Stock
Authorized NZ Distributor – Marvle3D
*Bambu Lab Part- Extruder Gear Assembly for P2S
-Designed to replace worn or damaged extruder gears
-Restores stable filament feeding and print consistency
-Prevents issues caused by gear or bearing wear
-Recommended when advised by Bambu Lab support
-Built for reliable long-term extrusion performance
Compatible Printers: P2 Series
Why Marvle3D?
Marvle3D—New Zealand’s expert since 2016, offering friendly support, in-store demos, and one of the country’s largest ranges.
![3520 AMS Internal Hub Motor for AMS 2 PRO [FAM013]](https://dev.marvle3d.co.nz/16181-home_default/bambu-lab-part-.jpg)
![3520 AMS Internal Hub Motor for AMS 2 PRO [FAM013]](https://dev.marvle3d.co.nz/16179-home_default/bambu-lab-part-.jpg)
![3pc of Ceramic Heater and Hotend Thermistor for P1 [FAH001-CT]](https://dev.marvle3d.co.nz/15833-home_default/bambu-lab-part-ceramic-heater-and-hotend-thermistor-for-p1-3pc.jpg)
![3pc of Ceramic Heater and Hotend Thermistor for P1 [FAH001-CT]](https://dev.marvle3d.co.nz/15834-home_default/bambu-lab-part-ceramic-heater-and-hotend-thermistor-for-p1-3pc.jpg)
![AC Board for X1/ P1 [DLB017]](https://dev.marvle3d.co.nz/16259-home_default/bambu-lab-part-.jpg)
![AC Board for X1/ P1 [DLB017]](https://dev.marvle3d.co.nz/16261-home_default/bambu-lab-part-.jpg)
![Active Chamber Exhaust for H2D [FAC120]](https://dev.marvle3d.co.nz/16208-home_default/bambu-lab-part-.jpg)
![Active Chamber Exhaust for H2D [FAC120]](https://dev.marvle3d.co.nz/16209-home_default/bambu-lab-part-.jpg)
![Active Support Shaft Assembly for AMS 2 Pro [SAA034]](https://dev.marvle3d.co.nz/16473-home_default/bambu-lab-part-.jpg)
![Active Support Shaft Assembly for AMS 2 Pro [SAA034]](https://dev.marvle3d.co.nz/16471-home_default/bambu-lab-part-.jpg)
![AMS 2 Pro Hub for A1 [SA013]](https://dev.marvle3d.co.nz/16332-home_default/bambu-lab-part-a1-mini-ams-hub-for-ams-2-pro.jpg)
![AMS 2 Pro Hub for A1 [SA013]](https://dev.marvle3d.co.nz/16333-home_default/bambu-lab-part-a1-mini-ams-hub-for-ams-2-pro.jpg)
![AMS Active Support Shaft Assembly [SA001-S2]](https://dev.marvle3d.co.nz/15836-home_default/bambu-lab-part-ams-active-support-shaft-assembly.jpg)
![AMS Active Support Shaft Assembly [SA001-S2]](https://dev.marvle3d.co.nz/15837-home_default/bambu-lab-part-ams-active-support-shaft-assembly.jpg)
![Hotend Silicone Sock for H2 [FAH022]](https://dev.marvle3d.co.nz/14194-home_default/bambu-lab-h2d-series-hotend-silicone-sock.jpg)
![Bambu Lab XY Belt for P2S 3D Printer [FAC169]](https://dev.marvle3d.co.nz/17537-home_default/xy-belt-for-p2s-fac169-.jpg)
![Bambu Lab XY Belt for P2S 3D Printer [FAC169]](https://dev.marvle3d.co.nz/17538-home_default/xy-belt-for-p2s-fac169-.jpg)
![Hotend Silicone Sock for P2S [FAH048]](https://dev.marvle3d.co.nz/16343-home_default/bambu-lab-part-hotend-silicone-sock-for-p2s.jpg)
![Hotend Silicone Sock for P2S [FAH048]](https://dev.marvle3d.co.nz/16345-home_default/bambu-lab-part-hotend-silicone-sock-for-p2s.jpg)