- New
![Cooling Fan for H2S [FAF020]](https://dev.marvle3d.co.nz/17347-large_default/cooling-fan-for-h2s-faf020-.jpg "Cooling Fan for H2S [FAF020]")
![Cooling Fan for H2S [FAF020]](https://dev.marvle3d.co.nz/17347-medium_default/cooling-fan-for-h2s-faf020-.jpg "Cooling Fan for H2S [FAF020]")
![Cooling Fan for H2S [FAF020]](https://dev.marvle3d.co.nz/17348-medium_default/cooling-fan-for-h2s-faf020-.jpg "Cooling Fan for H2S [FAF020]")
![Cooling Fan for H2S [FAF020]](https://dev.marvle3d.co.nz/17349-medium_default/cooling-fan-for-h2s-faf020-.jpg "Cooling Fan for H2S [FAF020]")

228 Bush Road, Rosedale | Mon–Sat 9:30–4:30

Auckland Local Stock
Authorized NZ Distributor – Marvle3D
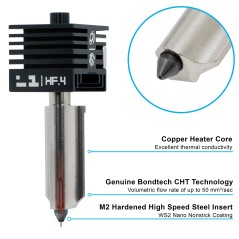
*Cooling Fan for H2S [FAF020]
-Genuine part cooling fan replacement
-Designed for precise filament cooling
-Works with the toolhead air duct
-Supports crisp and detailed print results
-Built for reliable and consistent performance
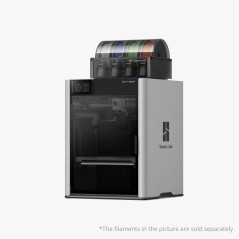
Compatible With: Bambu Lab H2S
Why Marvle3D?
Marvle3D—New Zealand’s expert since 2016, offering friendly support, in-store demos, and one of the country’s largest ranges.
 Security policy(edit with the Customer Reassurance module)
 Delivery policy(edit with the Customer Reassurance module)
 Return policy(edit with the Customer Reassurance module)
Overview: The Part Cooling Fan, located at the toolhead's base, works in tandem with the Air Duct to swiftly cool extruded filament.
Remove Part Cooling Fan
Step 1: Loosen the part cooling fan
Remove the 3 screws of the part cooling fan, of which the 1 screw on the back is locked with the toolhead rear housing.
After loosening the screws, do not pull the fan, just let the fan droop naturally to avoid damaging the connector.
Step 2: Loosen the toolhead rear housing
Remove the 2 screws on the toolhead rear housing and open the interface cover;
After opening the interface cover, use your fingers to gently push the toolhead back from the inner wall.
Step 3: Remove the part cooling fan
Disconnect the hotend heating assembly plug;
Tear off the acetate tape on the part cooling fan plug;
Please save the tape, you need to re-attach it during installation.
Pinch the base of the connector and apply force in the direction perpendicular to the PBC board to disconnect the part cooling fan plug.
Unthread the cables from the cable clips and remove the part cooling fan.
Install Part Cooling Fan
Step 1: Connect the part cooling fan plug and the hotend heating assembly plug
Insert the part cooling fan cable into the cable clip;
Place the plug's jack facing the socket on the TH board, align it, press down the plug, and connect the fan cable;
Re-attach the acetate tape;
Pre-align the screw holes of the fan, arrange the fan cable on the TH board, and pull it upwards, fold the cable to prevent it from being crushed by the fan housing or the toolhead rear housing of the toolhead and causing fan abnormality.
After arranging the cables, insert the hotend heating assembly plug, and use the hotend heating assembly plug and cable to press the part cooling fan cable.
Step 2: Install the toolhead rear housing
Install the toolhead rear housing;
After installation, make sure the part cooling fan cable is in the dedicated notch to avoid being squeezed by the rear housing frame.
Step 3: Install the part cooling fan
Align the screw holes and install the part cooling fan; when inserting the fan, be careful not to press the fan cable.
If the cable is too long, return to step 1 of the installation guide and fold the excess cable first. Tighten the three screws to secure the cooling fan.
Calibration after operation
It is recommended to calibrate the printer after completing the replacement.
Specific References
No customer reviews for the moment.
Auckland Local Stock
Authorized NZ Distributor – Marvle3D
*Cooling Fan for H2S [FAF020]
-Genuine part cooling fan replacement
-Designed for precise filament cooling
-Works with the toolhead air duct
-Supports crisp and detailed print results
-Built for reliable and consistent performance
Compatible With: Bambu Lab H2S
Why Marvle3D?
Marvle3D—New Zealand’s expert since 2016, offering friendly support, in-store demos, and one of the country’s largest ranges.
![Bambu Lab Extruder Filament Sensor for H2S & H2S Laser Printer [FAC142]](https://dev.marvle3d.co.nz/16342-home_default/bambu-lab-part-extruder-filament-sensor-for-h2s.jpg)
![Bambu Lab Extruder Filament Sensor for H2S & H2S Laser Printer [FAC142]](https://dev.marvle3d.co.nz/16340-home_default/bambu-lab-part-extruder-filament-sensor-for-h2s.jpg)

![Heatbed Unit 220V Printer for H2S [FAC150]](https://dev.marvle3d.co.nz/16702-home_default/bambu-lab-part-filament-buffer-for-p2s.jpg)
![Heatbed Unit 220V Printer for H2S [FAC150]](https://dev.marvle3d.co.nz/16703-home_default/bambu-lab-part-filament-buffer-for-p2s.jpg)
![Hotend Heating Assembly for H2S [FAH046]](https://dev.marvle3d.co.nz/16441-home_default/bambu-lab-part-.jpg)
![Hotend Heating Assembly for H2S [FAH046]](https://dev.marvle3d.co.nz/16442-home_default/bambu-lab-part-.jpg)

![Right Side Panel for H2S [FAS067]](https://dev.marvle3d.co.nz/16459-home_default/bambu-lab-part-.jpg)
![Right Side Panel for H2S [FAS067]](https://dev.marvle3d.co.nz/16460-home_default/bambu-lab-part-.jpg)