- New
![Toolhead Rear Cover for P2S [FAE037]](https://dev.marvle3d.co.nz/17354-large_default/toolhead-rear-cover-for-p2s-fae037-.jpg "Toolhead Rear Cover for P2S [FAE037]")
![Toolhead Rear Cover for P2S [FAE037]](https://dev.marvle3d.co.nz/17354-medium_default/toolhead-rear-cover-for-p2s-fae037-.jpg "Toolhead Rear Cover for P2S [FAE037]")
![Toolhead Rear Cover for P2S [FAE037]](https://dev.marvle3d.co.nz/17355-medium_default/toolhead-rear-cover-for-p2s-fae037-.jpg "Toolhead Rear Cover for P2S [FAE037]")

228 Bush Road, Rosedale | Mon–Sat 9:30–4:30

Auckland Local Stock
Authorized NZ Distributor – Marvle3D
*Toolhead Rear Cover for P2S [FAE037]
-Plastic rear enclosure for the toolhead
-Designed to seal the rear section of the toolhead
-Part of the complete toolhead housing system
-Helps protect internal toolhead components
-Engineered for precise fit and alignment
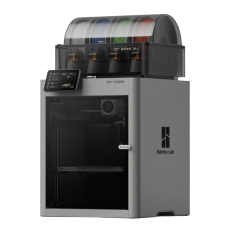
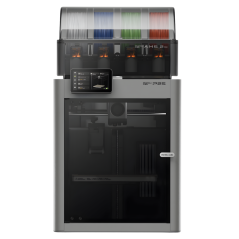
Compatible With: Bambu Lab P2S
Why Marvle3D?
Marvle3D—New Zealand’s expert since 2016, offering friendly support, in-store demos, and one of the country’s largest ranges.
 Security policy(edit with the Customer Reassurance module)
 Delivery policy(edit with the Customer Reassurance module)
 Return policy(edit with the Customer Reassurance module)
Removing the Toolhead Housing
Step 1: Remove the Toolhead Front Cover
Open the Toolhead Front Cover, press the connector latch to unplug the cable, and then remove the Toolhead Front Cover.
Step 2: Remove the Toolhead Rear Cover
Remove the four screws with an H1.5 Allen key.
Grip the Rear Cover near the upper rod, then pull it backward firmly to detach it.
Step 3: Remove the Toolhead Middle Frame
Remove the four screws with an H1.5 Allen key.
Rotate the cable chain bracket to align it with the notch at the top of the Middle Frame, then gently lift the bottom of the Middle Frame upward to release it.
Detach the Toolhead Middle Frame from the cable chain bracket, then remove it.
Installing the Toolhead Housing
Step 1: Install the Toolhead Middle Frame
Align the notch on the Printhead Middle Frame with the cable chain bracket, then slide it into position.
Install the Middle Frame and secure it with the four screws.
Step 2: Install the Toolhead Rear Cover
Install the Toolhead Rear Cover, then secure it with four screws.
Step 3: Install the Toolhead Front Cover
Connect the Toolhead Front Cover cable to the Extruder Connection Board connector.
The Toolhead Front Cover Assembly is magnetically secured. To reinstall, simply close it into position.
Verifying Functionality
Check the gaps between the housing parts to ensure there is no visible misalignment or lifting.
Verify that the part-cooling fan turns on and off normally.
Specific References
No customer reviews for the moment.
Auckland Local Stock
Authorized NZ Distributor – Marvle3D
*Toolhead Rear Cover for P2S [FAE037]
-Plastic rear enclosure for the toolhead
-Designed to seal the rear section of the toolhead
-Part of the complete toolhead housing system
-Helps protect internal toolhead components
-Engineered for precise fit and alignment
Compatible With: Bambu Lab P2S
Why Marvle3D?
Marvle3D—New Zealand’s expert since 2016, offering friendly support, in-store demos, and one of the country’s largest ranges.


![Eddy Sensor for P2S [FAC155]](https://dev.marvle3d.co.nz/16708-home_default/bambu-lab-part-filament-buffer-for-p2s.jpg)
![Eddy Sensor for P2S [FAC155]](https://dev.marvle3d.co.nz/16709-home_default/bambu-lab-part-filament-buffer-for-p2s.jpg)
![Extruder Gear Assembly for P2S [FAE035]](https://dev.marvle3d.co.nz/16745-home_default/bambu-lab-part-filament-buffer-for-p2s.jpg)
![Extruder Gear Assembly for P2S [FAE035]](https://dev.marvle3d.co.nz/16744-home_default/bambu-lab-part-filament-buffer-for-p2s.jpg)
![Extruder Unit Front Cover Assembly for P2S [FAE039]](https://dev.marvle3d.co.nz/16754-home_default/bambu-lab-part-filament-buffer-for-p2s.jpg)
![Filament Buffer for P2S [SA011]](https://dev.marvle3d.co.nz/16617-home_default/bambu-lab-part-filament-buffer-for-p2s.jpg)
![Filament Buffer for P2S [SA011]](https://dev.marvle3d.co.nz/16618-home_default/bambu-lab-part-filament-buffer-for-p2s.jpg)
![Hotend Heating Assembly for P2S [FAH049]](https://dev.marvle3d.co.nz/16444-home_default/bambu-lab-part-.jpg)
![Hotend Heating Assembly for P2S [FAH049]](https://dev.marvle3d.co.nz/16445-home_default/bambu-lab-part-.jpg)
![Hotend Silicone Sock for P2S [FAH048]](https://dev.marvle3d.co.nz/16343-home_default/bambu-lab-part-hotend-silicone-sock-for-p2s.jpg)
![Hotend Silicone Sock for P2S [FAH048]](https://dev.marvle3d.co.nz/16345-home_default/bambu-lab-part-hotend-silicone-sock-for-p2s.jpg)