- New
![Screen FPC Cable for P2S [CAB048]](https://dev.marvle3d.co.nz/17365-large_default/screen-fpc-cable-for-p2s-cab048-.jpg "Screen FPC Cable for P2S [CAB048]")
![Screen FPC Cable for P2S [CAB048]](https://dev.marvle3d.co.nz/17365-medium_default/screen-fpc-cable-for-p2s-cab048-.jpg "Screen FPC Cable for P2S [CAB048]")
![Screen FPC Cable for P2S [CAB048]](https://dev.marvle3d.co.nz/17366-medium_default/screen-fpc-cable-for-p2s-cab048-.jpg "Screen FPC Cable for P2S [CAB048]")
![Screen FPC Cable for P2S [CAB048]](https://dev.marvle3d.co.nz/17367-medium_default/screen-fpc-cable-for-p2s-cab048-.jpg "Screen FPC Cable for P2S [CAB048]")

228 Bush Road, Rosedale | Mon–Sat 9:30–4:30

Auckland Local Stock
Authorized NZ Distributor – Marvle3D
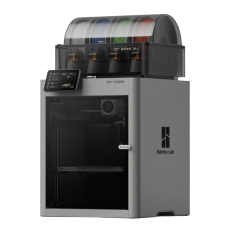
*Screen FPC Cable for P2S [CAB048]
-Connects the front touch screen to the AP board
-Designed for 5-inch display signal transmission
-Flexible FPC ribbon cable construction
-Supports compact internal cable routing
-Genuine replacement cable component
Compatible Printers: Bambu Lab P2S
Why Marvle3D?
Marvle3D—New Zealand’s expert since 2016, offering friendly support, in-store demos, and one of the country’s largest ranges.
 Security policy(edit with the Customer Reassurance module)
 Delivery policy(edit with the Customer Reassurance module)
 Return policy(edit with the Customer Reassurance module)
Touchscreen FPC Cable Replacement Guide for the P2S
A step by step guide to replace the FPC cable which connect the 5-inch touchscreen to the AP board on the P2S
Removing the Touchscreen Cable
Step 1: Remove the Screen
First, refer to the Screen Replacement Guide wiki page to remove the screen.
Step 2: Remove the Cable
Open the AP cover front section, then unlock the screen FPC cable lock on the AP board to disconnect the cable from the AP board.
Remove the old ribbon cable from the AP board connector.
Pull the cable from the side that connects to the screen, guiding the other end to fit through the slot until the entire cable is free.
Installing the Touchscreen Cable
Step 1: Install the Screen Line
Fit the thin end of the cable through the screen cable slot and route it toward the AP board, leaving the thicker metal connector near where the screen is installed.
The cable must take a sharp turn toward the AP board once inserted through the slot in the front.
Align the thin connector end of the screen cable with the socket on the AP board, careful to insert it straight and centered in the socket with the locking buckle.
Lock the buckle over the inserted cable, avoiding using too much force and ensuring that the cable is inserted fully and aligned properly.
Be sure to route the screen cable behind the USB port component hanging from the top of the printer's frame near the corner.
Step 2: Install the Screen
Refer to the Screen Replacement Guide wiki page: https://wiki.bambulab.com/en/p2s/maintenance/replace-screen to reinstall the screen.
Verifying Functionality
Connect the power supply and turn on the printer to check whether the screen displays correctly and registers touch input normally.
Specific References
No customer reviews for the moment.
Auckland Local Stock
Authorized NZ Distributor – Marvle3D
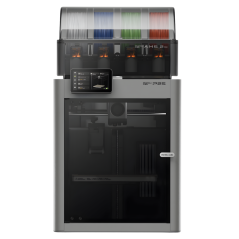
*Screen FPC Cable for P2S [CAB048]
-Connects the front touch screen to the AP board
-Designed for 5-inch display signal transmission
-Flexible FPC ribbon cable construction
-Supports compact internal cable routing
-Genuine replacement cable component
Compatible Printers: Bambu Lab P2S
Why Marvle3D?
Marvle3D—New Zealand’s expert since 2016, offering friendly support, in-store demos, and one of the country’s largest ranges.


![Eddy Sensor for P2S [FAC155]](https://dev.marvle3d.co.nz/16708-home_default/bambu-lab-part-filament-buffer-for-p2s.jpg)
![Eddy Sensor for P2S [FAC155]](https://dev.marvle3d.co.nz/16709-home_default/bambu-lab-part-filament-buffer-for-p2s.jpg)
![Extruder Gear Assembly for P2S [FAE035]](https://dev.marvle3d.co.nz/16745-home_default/bambu-lab-part-filament-buffer-for-p2s.jpg)
![Extruder Gear Assembly for P2S [FAE035]](https://dev.marvle3d.co.nz/16744-home_default/bambu-lab-part-filament-buffer-for-p2s.jpg)
![Extruder Unit Front Cover Assembly for P2S [FAE039]](https://dev.marvle3d.co.nz/16754-home_default/bambu-lab-part-filament-buffer-for-p2s.jpg)
![Filament Buffer for P2S [SA011]](https://dev.marvle3d.co.nz/16617-home_default/bambu-lab-part-filament-buffer-for-p2s.jpg)
![Filament Buffer for P2S [SA011]](https://dev.marvle3d.co.nz/16618-home_default/bambu-lab-part-filament-buffer-for-p2s.jpg)
![Hotend Heating Assembly for P2S [FAH049]](https://dev.marvle3d.co.nz/16444-home_default/bambu-lab-part-.jpg)
![Hotend Heating Assembly for P2S [FAH049]](https://dev.marvle3d.co.nz/16445-home_default/bambu-lab-part-.jpg)
![Hotend Silicone Sock for P2S [FAH048]](https://dev.marvle3d.co.nz/16343-home_default/bambu-lab-part-hotend-silicone-sock-for-p2s.jpg)
![Hotend Silicone Sock for P2S [FAH048]](https://dev.marvle3d.co.nz/16345-home_default/bambu-lab-part-hotend-silicone-sock-for-p2s.jpg)